
Android Intents PART-1

1. Display the phone dialer with the given number
 Intent myActivity2 = new Intent (Intent.ACTION_DIAL,  
 Uri.parse( "tel:987-654-3210"));  


2. Doing a Google search

 Intent intent = new Intent(Intent.ACTION_WEB_SEARCH);  
 intent.putExtra(SearchManager.QUERY, "DJ-android blog");  
 startActivity(intent);  


3. Show all your Contacts
 String myData = "content://contacts/people/";  
 Intent myActivity2 = new Intent(Intent.ACTION_VIEW,Uri.parse(myData));  
 startActivity(myActivity2);  


4. Show a Particular Contact
 String myData = "content://contacts/people/100";  
 Intent myActivity2 = new Intent(Intent.ACTION_VIEW,Uri.parse(myData));  
 startActivity(myActivity2);  
5. Edit a Particular Contact
 String myData = "content://contacts/people/2";  
 Intent myActivity2 = new Intent(Intent.ACTION_EDIT,Uri.parse(myData));  
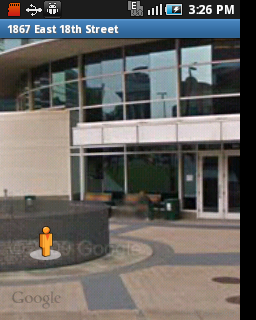
 startActivity(myActivity2);  
6. Geo Mapping an Address
 String geoCode = "geo:0,0?q=1860+east+18th+street+cleveland+oh";  
 Intent intent = new Intent(Intent.ACTION_VIEW, Uri.parse(geoCode));  
 startActivity(intent);  


 String geoCode = "geo:23.0333,72.6167";  
 Intent intent = new Intent(Intent.ACTION_VIEW, Uri.parse(geoCode));  
 startActivity(intent);  


 String thePlace = "Cleveland State University";  
 Intent intent = new Intent(android.content.Intent.ACTION_VIEW,Uri.parse("geo:0,0?q= (" + thePlace + ")"));  
 startActivity(intent);  


 String geoCode = "google.streetview:cbll=41.5020952,-81.6789717&cbp=1,270,,45,1&mz=1";  
 Intent intent = new Intent(Intent.ACTION_VIEW, Uri.parse(geoCode));  
 startActivity(intent);  


You need below Permission :
 <uses-permission android:name="android.permission.ACCESS_COARSE_LOCATION" />  
 <uses-permission android:name="android.permission.INTERNET" />  

Comments

Popular posts from this blog

Android - Google MAP V2 PART 3 (add Polyline)

Download Full Code  of  PART-1 , 2 , 3 , 4 Before go ahead Please look in to PART-1 & PART-2 I have just modify Main Activity class: package com.djandroid.mapsv2; import android.graphics.Color; import android.os.Bundle; import android.support.v4.app.FragmentActivity; import android.support.v4.app.FragmentManager; import com.google.android.gms.maps.GoogleMap; import com.google.android.gms.maps.GoogleMap.OnMapClickListener; import com.google.android.gms.maps.GoogleMap.OnMarkerClickListener; import com.google.android.gms.maps.SupportMapFragment; import com.google.android.gms.maps.model.LatLng; import com.google.android.gms.maps.model.Marker; import com.google.android.gms.maps.model.MarkerOptions; import com.google.android.gms.maps.model.Polyline; import com.google.android.gms.maps.model.PolylineOptions; public class MainActivity extends FragmentActivity { private GoogleMap MAP; private boolean markClic...

Android - Notifications - 3 (Applying a big view style to a notification)

Big picture style Bitmap icon1 = BitmapFactory.decodeResource(getResources(), R.drawable.dhaval1); NotificationCompat.Builder mBuilder = new NotificationCompat.Builder( this).setAutoCancel(true) .setContentTitle("DJ-Android notification") .setSmallIcon(R.drawable.ic_launcher).setLargeIcon(icon1) .setContentText("Hello World!"); NotificationCompat.BigPictureStyle bigPicStyle = new NotificationCompat.BigPictureStyle(); bigPicStyle.bigPicture(icon1); bigPicStyle.setBigContentTitle("Dhaval Sodha Parmar"); mBuilder.setStyle(bigPicStyle); // Creates an explicit intent for an Activity in your app Intent resultIntent = new Intent(this, testActivity.class); // The stack builder object will contain an artificial ba...

Connecting mysql Database in ANDROID using PHP & JSON

 To implement this tutorial you should have basic knowledge of how to run PHP script and start server.  If we talk about client-server architecture, client is Android device and in server side there is a combination of PHP Script and MySQL. In short, PHP Script sits in middle as shown in image. Lets suppose that we have a MySQL database named Employee, and a table int created, with the following SQL: CREATE TABLE `employee` (   `emp_id` int(11) NOT NULL auto_increment,   `emp_name` varchar(100) NOT NULL,   PRIMARY KEY  (`emp_id`) ) ENGINE=InnoDB  DEFAULT CHARSET=latin1 AUTO_INCREMENT=5 ; The PHP code will be very simple: Now Create Android Project :  The Android part is only a bit more complicated: -use a HttpPost to get the data -convert response to string -parse JSON data in to List In Your First Activity : O/P :